Jenkins has plugins like ssh-agent and Publish Over SSH, but I preferred not to depend on them, so I built the flow without those plugins.
This project uses Nexacro on the frontend. The pipeline is:
- Nexacro build
- Maven build
- Deploy via
scp
Jenkins server SSH key
To use scp over SSH, generate an SSH key and register it on the deploy target.
ssh-keygenPress Enter with no passphrase. Put the generated .ssh\id_rsa.pub into the remote server (dev) at /root/.ssh/authorized_keys:
scp -r .ssh\id_rsa.pub root@HOST_IP:/root/.ssh/authorized_keys
chmod 700 /root/.ssh
chmod 600 /root/.ssh/authorized_keys
If you skip the permission settings after copying, scp from Jenkins to the deploy server will prompt for a password and the job will hang.
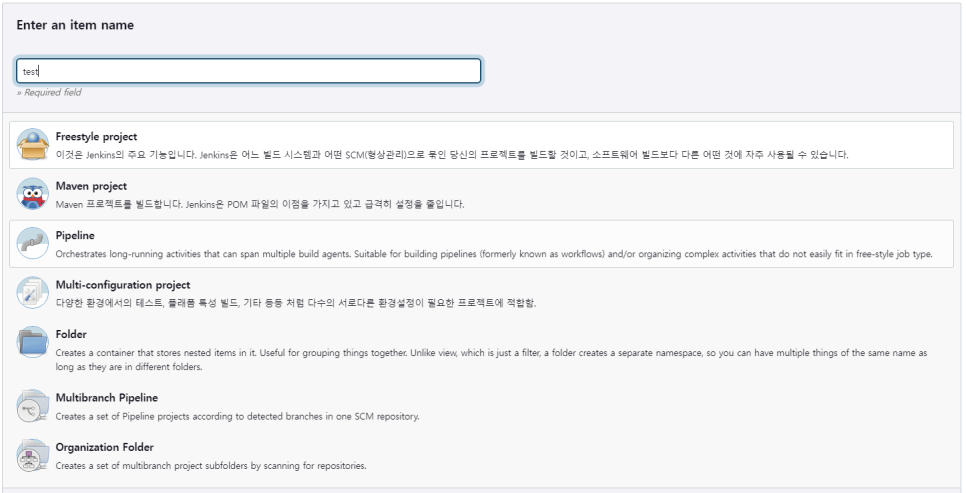
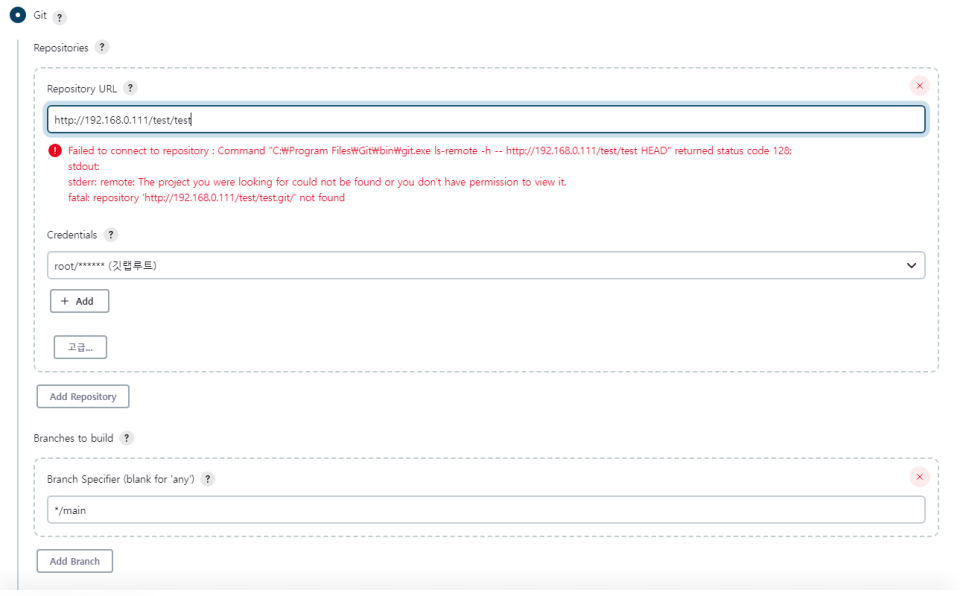
This job uses a freestyle project instead of a Pipeline job. GitLab connection settings follow the earlier post (GitLab & Jenkins basic setup and webhook integration).
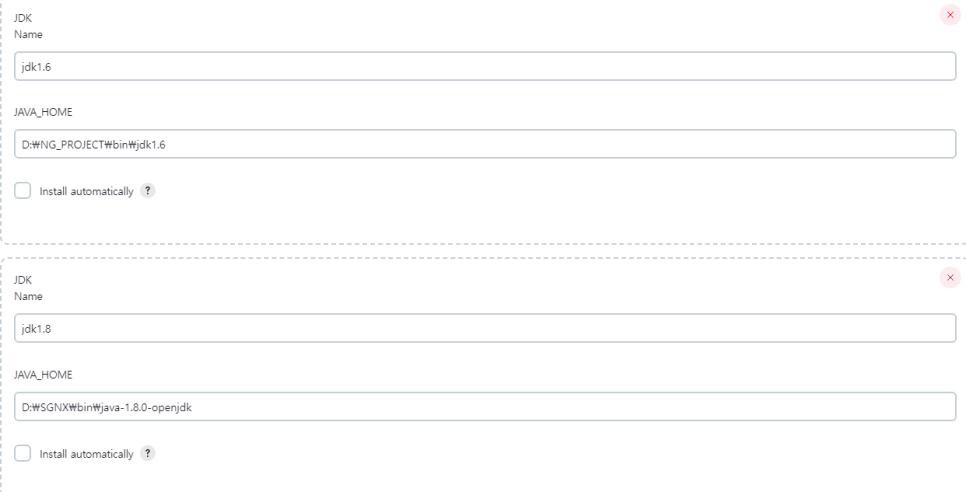
JDK uses 1.8 — install and register it the same way as 1.6.
When configuring Git, you should not see red error text (that means the connection failed).
Build triggers are set the same way as in the GitLab & Jenkins webhook post.
Build steps
Nexacro build
Because Jenkins runs on a Windows server, every step except the Maven build uses Execute Windows batch command.
Move into the Nexacro install directory and build. The Nexacro manual shows a command like:
nexacrodeploy17.exe -P "xprj file in the project" -O "generate output path" -B "lib path in the project" -D "deploy output path" -MERGEWith my paths:
cd C:\Program Files (x86)\nexacro\17.1
nexacrodeploy17.exe -P "C:\ProgramData\Jenkins\.jenkins\workspace\TEST\src\main\sgnx_ui_17_1\sgnx_ui.xprj" -O "C:\ProgramData\Jenkins\.jenkins\workspace\TEST\src\main\webapp\ui" -B "C:\ProgramData\Jenkins\.jenkins\workspace\TEST\sgnx_generate\nexacro17lib" -D "D:\jenkins\deploy_glb\ui" -MERGE
Maven build
Choose Invoke top-level Maven targets:
clean— remove previous artifactsinstall— install artifacts to the local repository-P local— use thelocalprofile
Deploy
Line breaks below are for readability only. Enter each command as a single line when you use it.
1. Stop the service and clear the previous WAR
ssh wfly@192.168.0.222 "/home/wfly/wildfly-14.0.1.Final/bin/kill.sh; rm -rd home/wfly/wildfly-14.0.1.Final/projet/deployments/ROOT.war; touch /home/wfly/wildfly-14.0.1.Final/project/deployments/ROOT.war.deployed"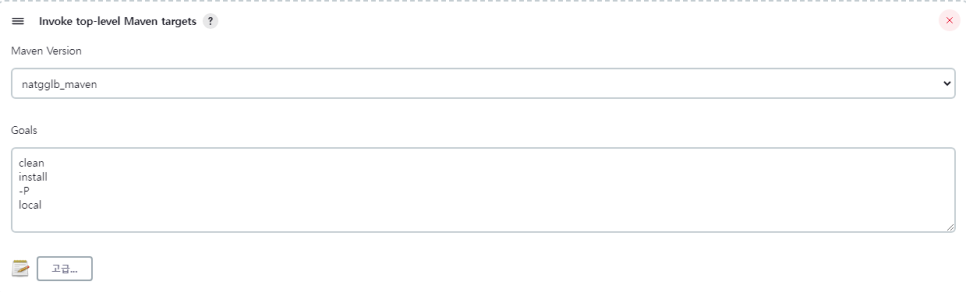
2. Deploy Maven and Nexacro build outputs
scp -r C:\ProgramData\Jenkins\.jenkins\workspace\project\target\ROOT wfly14@192.168.0.222:/home/wfly/wildfly-14.0.1.Final/project/deployments/ROOT.war
scp -r D:\jenkins\deploy_glb\ui wfly14@192.168.0.222:/home/wfly/wildfly-14.0.1.Final/project/deployments/ROOT.war/
3. Start the service
ssh wfly14@192.168.0.222 "/home/wfly/wildfly-14.0.1.Final/bin/start.sh"
Leave a Reply